Annotation Viewer
The Annotation Viewer is a web-based annotation tool that allows users to mark up texts with annotations.
The beta version of Annotate in the TextGridRepository (TextGridRep) provides the possibility to load texts from the TextGridRep directly into the Annotation Viewer in order to perform the annotation there. The Annotation Viewer is a web application; downloads and installations are thus not necessary and the user accesses external servers, so that users do not require large computing capacities. The step of downloading texts from the TextGridRep and then loading them back into the Annotation Viewer is eliminated.
Starting the Annotation Viewer
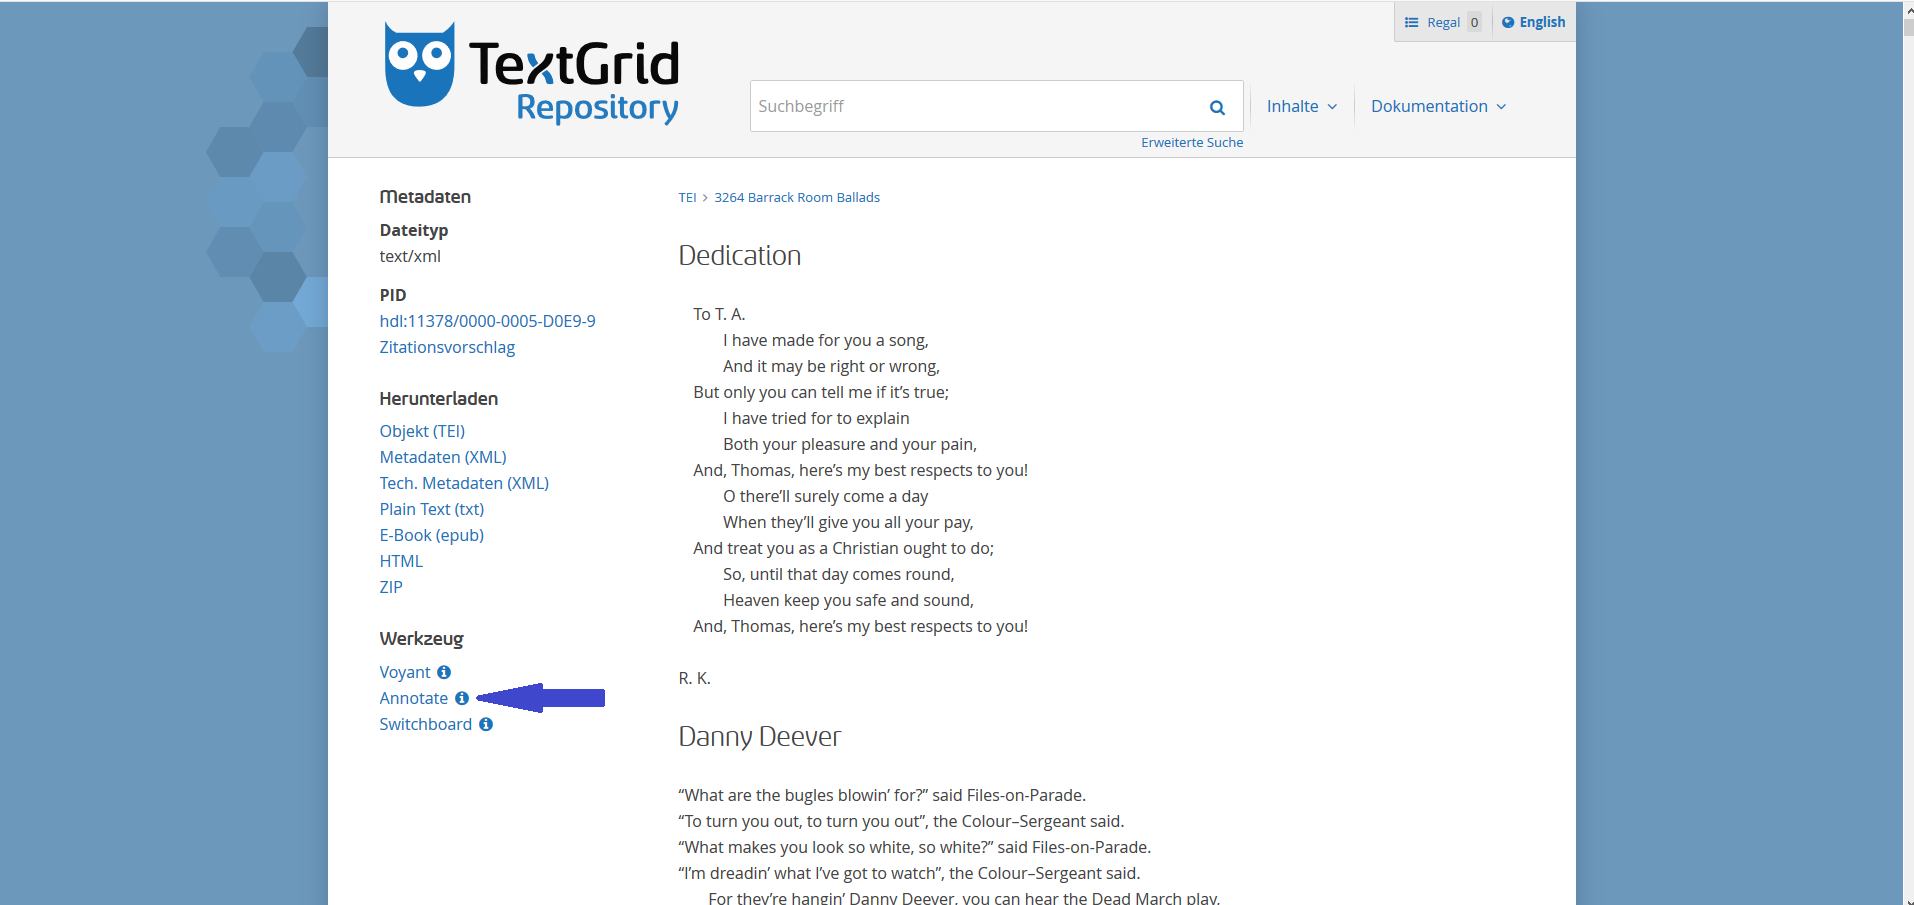
To start the analysis, open a text and click Annotate on the left side of the screen (clicking the blue 🛈 will take you to this documentation):
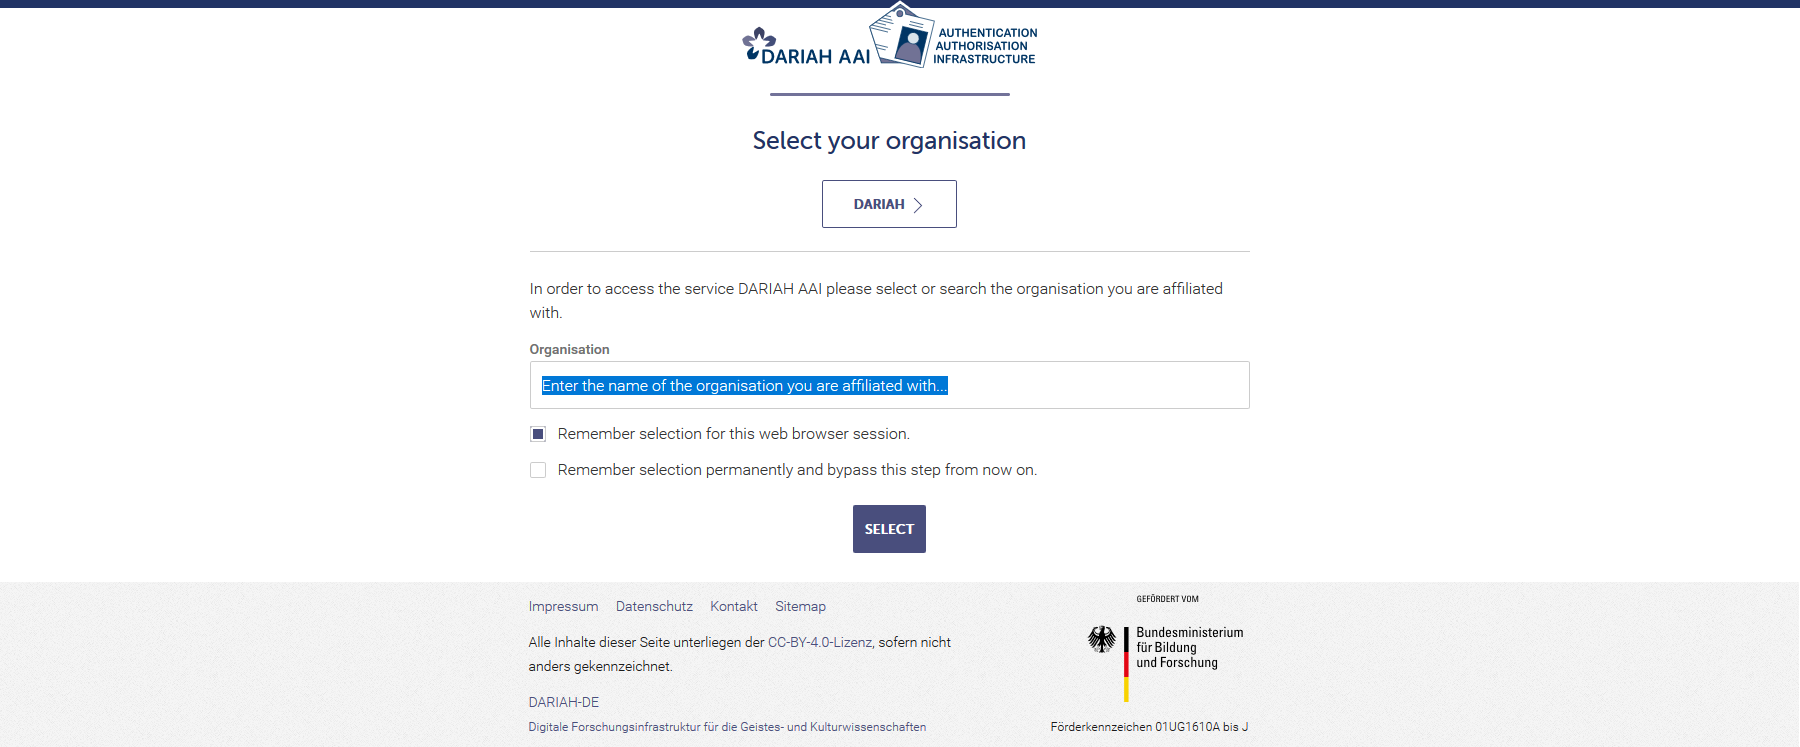
If you are not yet logged in to DARIAH-AAI, you will first be directed to the following login page, where you can either log in directly with your DARIAH login or identify yourself by your institution participating in DARIAH-AAI. If you are already logged in, this step is not necessary. The login guarantees that your annotations are saved and group annotations are possible.
You will then be redirected to the Annotation Viewer page.
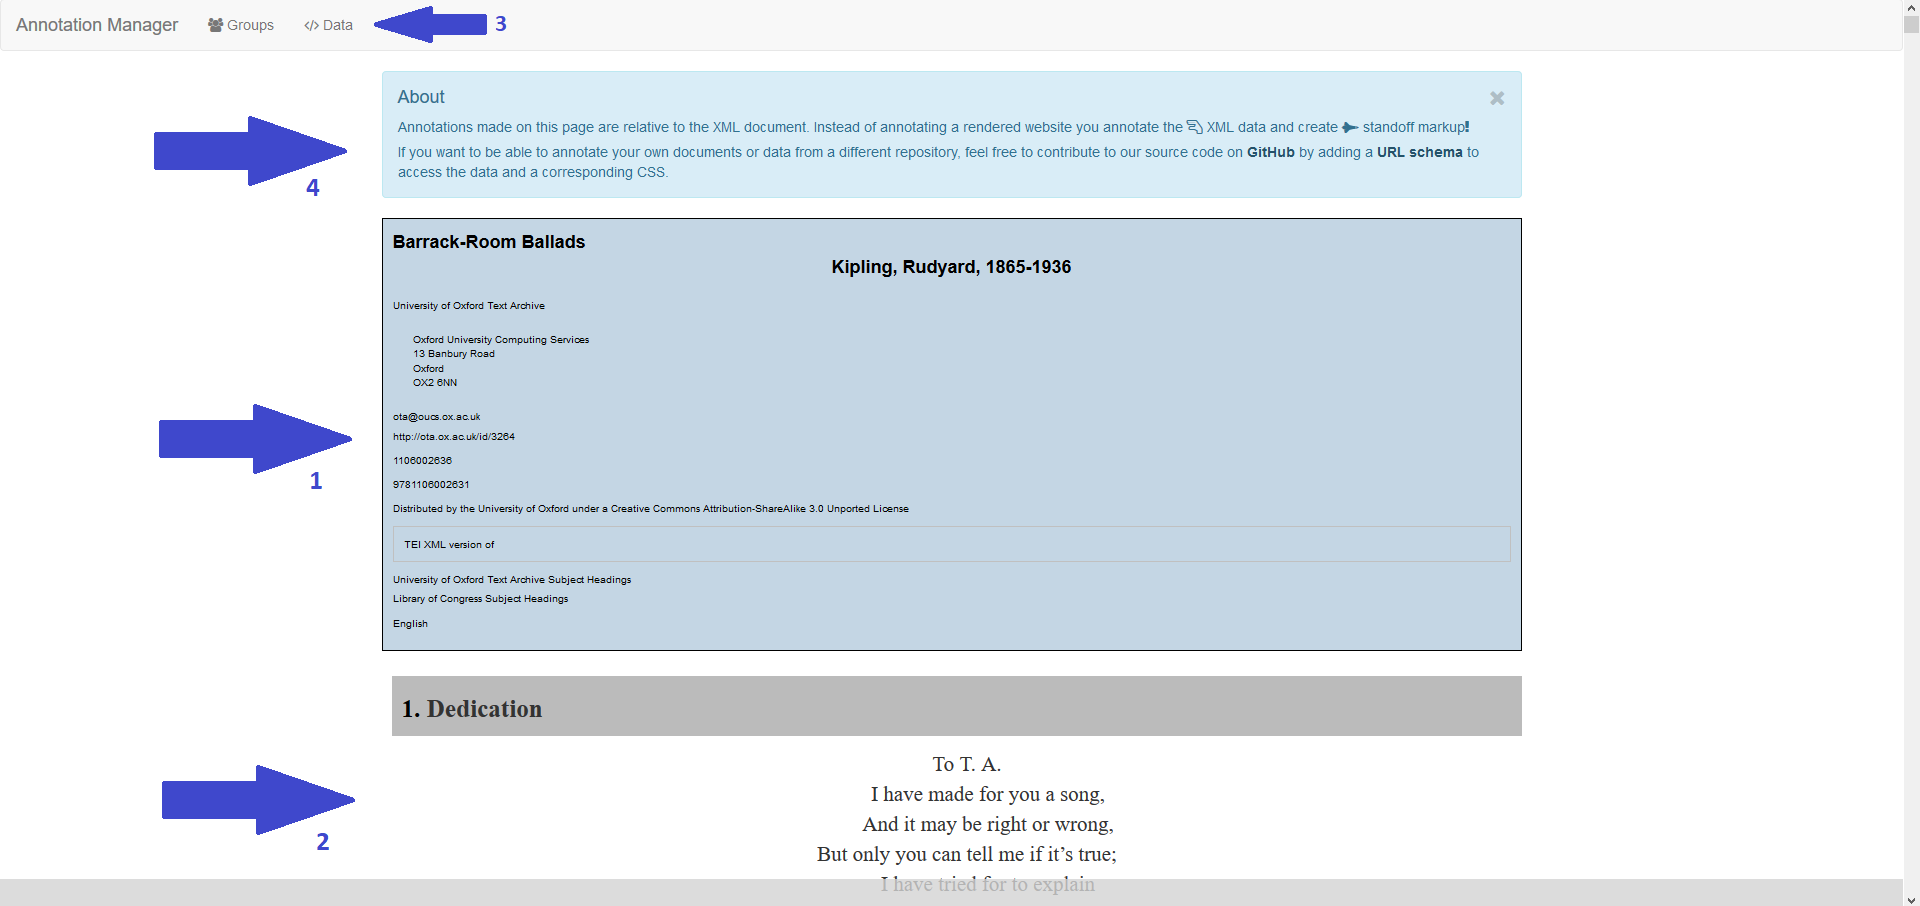
In the middle of the page (arrow 1) you will now see the metadata of your loaded text, as entered in the TextGridRep. Below that (arrow 2) you find the text itself. In the upper area (arrow 3) you see the menu in the gray bar; this will be explained in more detail below. Finally, there is (arrow 4) an "About" note on how the annotation is technically done. By clicking on the x on the right side of this window you can close this hint.
Creating annotations in the Annotation Viewer
The Annotation Viewer allows you to freely annotate a text passage or a word at any point in the text in order to store an annotation there. To do this, select the desired passage in the text.
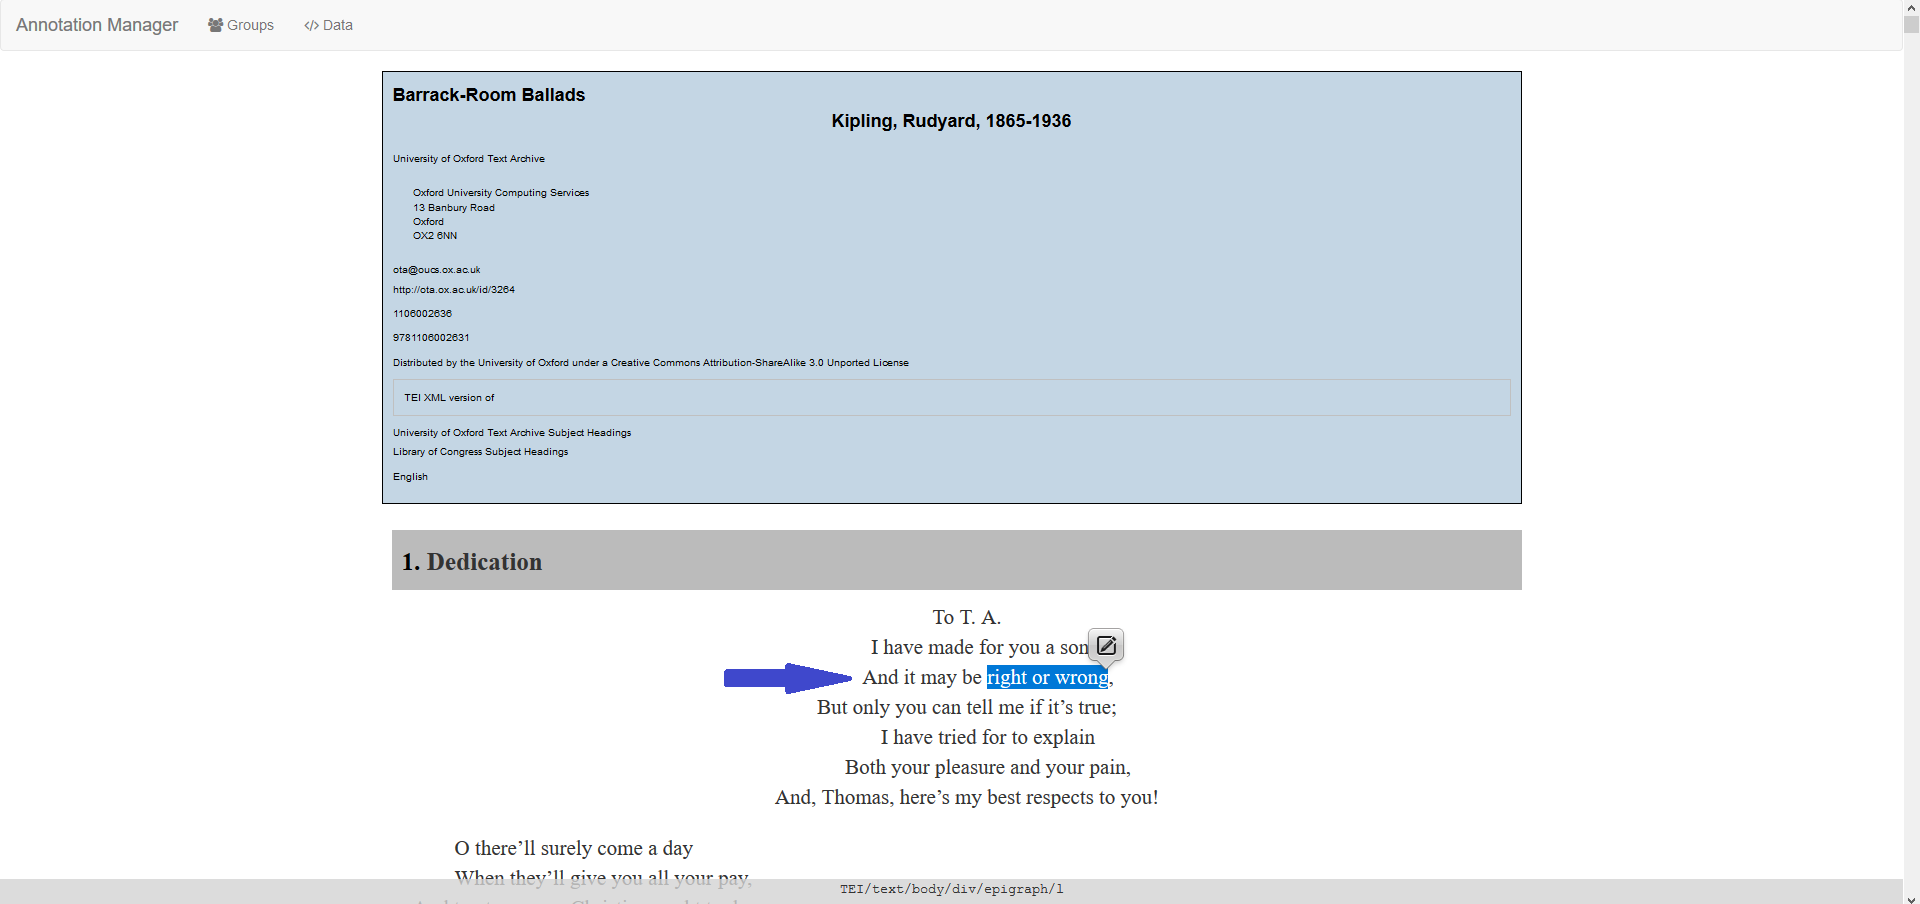
First, you will see the XPath of the position you are currently on with your mouse in the gray footer. Secondly, you will now see a speech bubble with a writing icon directly to the right of your selected text. To perform the annotation, please click on the speech bubble. The speech bubble will now enlarge and the input area will appear.

In the upper area at " Comments" you can add your comment to the text passage. In the lower area you can assign tags that act as categories which helps you to group your annotations. If you want to assign multiple tags, separate them with a single space. To save the annotation, click "Save". The annotation will be saved when you return to the page logged in with your account. If you now move your cursor over the highlighted text passage, your annotation will be displayed. There you will also find the option to edit the annotation in the upper right corner. Text passages can also be annotated overlapping (or congruent). In this case, select the entire text passage as above – regardless of whether there are already annotations in it or not. If you now move the mouse over a passage for which several annotations are stored, they will all be displayed according to the entered order. By the way, annotations are also possible in the metadata, footnotes or marginal notes.
Viewing and exporting annotations
To view a list of your annotations, click "Annotation Manager" in the upper left area.

Here you can see all the annotations you have made – even from other texts. The table shows the URL of the web page where the annotations were made, followed by your comments and tags. "Quotes" corresponds to the area you marked in the text for your annotation. Finally, the timestamp of creation and modification of the annotation and the group membership follows. All columns can be sorted alphabetically. In the menu above you can, among other things, extract a CSV table of all your annotations or change the number of visible columns. Once you have selected one or more annotations, you can add them to groups or export them to your own area in the TextGrid Laboratory.
Group annotations
The group feature was introduced to allow better annotation management, coordination and to share annotations with others. To create a group, click on "Groups" in the upper area. In the following window you can see an overview of your group memberships and which groups you manage as admin:

Click on "create a group" here to create a new group:

You can define a group name in the first line; in the second line you can add further DARIAH users to your group using their mail address. By clicking on "Create", your group is created and will be displayed in the list of your groups managed as admin (similar to the group "Test Documentation" in the previous picture).
If you now assign your annotations to a group in your Annotation Manager, they will also be visible to all other members of this group. This feature enables collaborative annotation work. For fast findability, it is a good idea to save your texts in TextGridRep on your shelf.
Contact
Do you have further questions regarding the annotate function in TextGridRep? Feel free to contact us!